How to Transfer your Domain to Google Domains Service
Recently we posted our article on Google domains which is a new Google service and you can buy new domains or transfer existing ones. “Google domains” is providing many features for free and currently this is Invite-only beta program. In this article, you will know how to transfer your existing domain to Google domains with extra features.
Steps to transfer your domain to Google Domains
I am not going to discuss any features of Google domains in this post as I have already discussed that. If you already have got an invitation code for Google domains, then just login to Google domain using that code and your Google account and follow the below steps.
Recommended Article: Get Alert when Google Index your Blog Pages
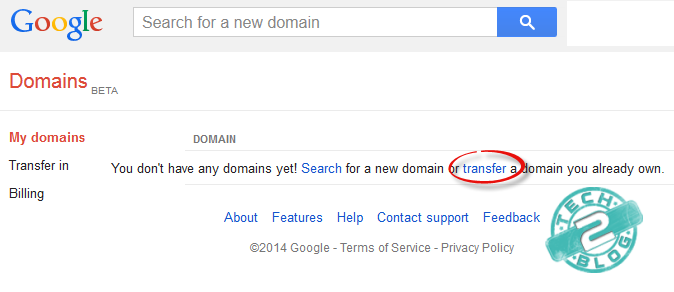
1. Go to my domain and click on transfer as shown below.

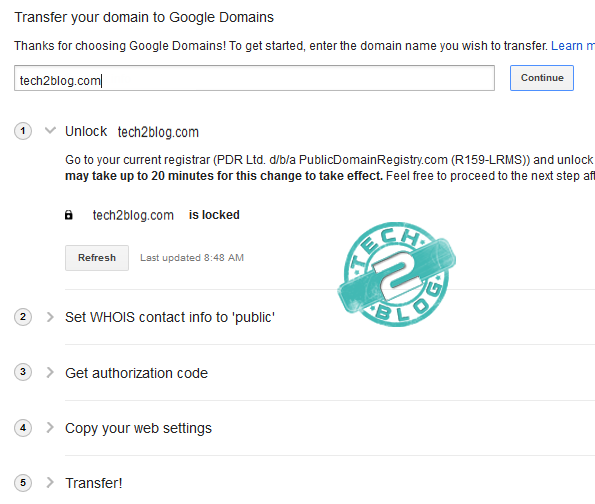
Now you will see place to enter your domain name. Put your domain name and click on continue.
2. In total their are 5 major steps to transfer your domain to Google domains as shown below.

I. Firstly, you will have to unlock your domain for transfer. So go to your domain service provider dashboard and unlock your domain for transfer.
II. Secondly, you will have to make your information public i.e set WHOIS contact info to public.
III. Thirdly, you will have to enter your transfer/authorization code from the current registrar.
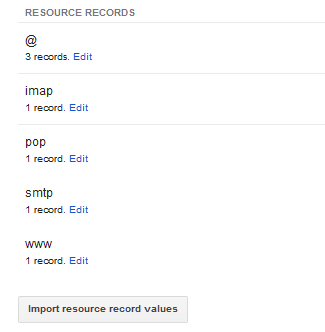
IV. Fourthly, you will get the option to save your current name servers or to set the Google name server as defaults. Here you also get the option to import your resource records value also.

If you are using blogspot with a custom domain, then importing the resource records it very beneficial.
V. You will confirm the transfer and Google domains will show you next date of renewing.
Though there is no fees of domain transfer but you will have to compulsory renew your domain at the time of transfer.
3. Now you will be shown form to put your contact information like name, address, phone number etc. Enter the information and proceed.
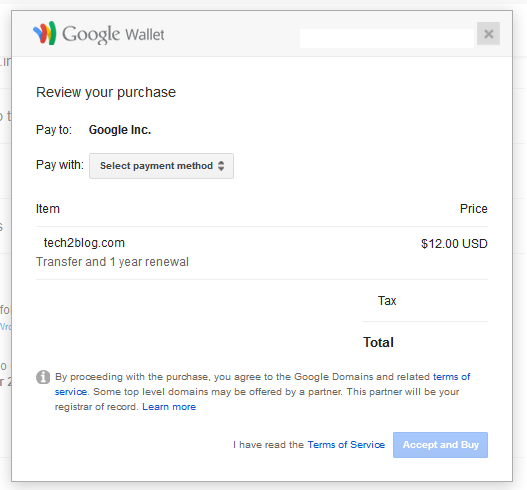
4. After following above steps you will be shown payment option. Just choose your payment option or add new method like Credit card and make the payment.

Note: If you are in a country other than U.S, then your credit card will not work. Currently payment is only working for U.S people. This also implies if you are in U.S IP.
Hope this tutorial is helpful for you and you will be able to easily transfer your domain to Google domains. If you have any issue at any step, let me know through your comments or email and I will try to help you out. Don’t forget to share this article with your friends and on social networks.


![51 Technology Websites That Accept Guest Posts [DA 60+] 4 High DR Guest Post Blogs](https://www.tech2blog.com/wp-content/uploads/2023/01/High-DR-Guest-Post-Blogs-70x70.jpg)