Get Your Own Lifetime Free Linux Cloud Server
Everyone is now talking about cloud servers to deploy their websites and other applications. Just to play around or hosting demo applications, we also need a test server that is always available for us. There are lots of cloud service providers like Amazon Web Services (AWS), Google Cloud Platform (GCP), Microsoft Azure, Oracle Cloud, Alibaba cloud, etc., but only few of them provide free servers for a lifetime. In this article, I am going to walk you through Oracle Cloud which provides 2 lifetime free virtual machines.

Now, that you are excited about your new free Linux cloud servers, let start talking about how to get them and if you think I’m talking nonsense, please check one of my free cloud servers: http://132.145.97.206/ and http://132.145.97.206:8080/ [Demo for checking Internet Speed].
To get free cloud servers, you will have to sign up for Oracle Cloud Free Tier service. But before that let’s see what else is available for free apart from US$300 in free credits for 1 month.
Always Free Services from Oracle Cloud
- 2 virtual machines with 1/8 OCPU and 1 GB memory each.
- Two Oracle Autonomous Databases with powerful tools like Oracle Application Express (APEX) and Oracle SQL Developer
- 2 Block Volumes, 100 GB total
- 10 GB Object Storage
- 10 GB Archive Storage
- Load balancer – 1 instance with 10 Mbps
- Outbound Data Transfer: 10 TB per month
- Notifications – 1 million delivery options per month, 1000 emails sent per month
- Please check full details here
How to Sign Up for Oracle Cloud Server?
I would say this is the simplest process of all. You just have to visit the Oracle cloud site and sign up for their services. Please note that to sign up, you should have a valid credit card. This is for verification purposes so that people don’t misuse their services.
How to Create VM Instance on Oracle Cloud?
Once you have created your account, you can start creating your free virtual machines. If you signed up for the first time, you can also create high capacity and high resource cloud servers as you get $300 USD for free for a month.
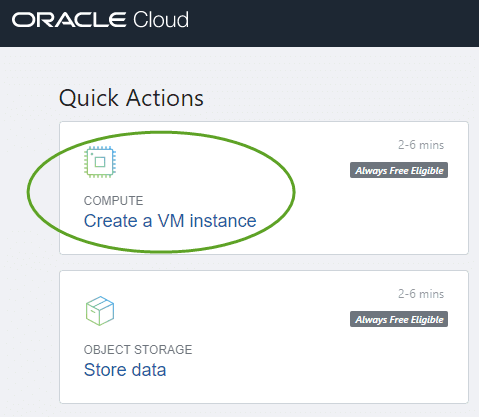
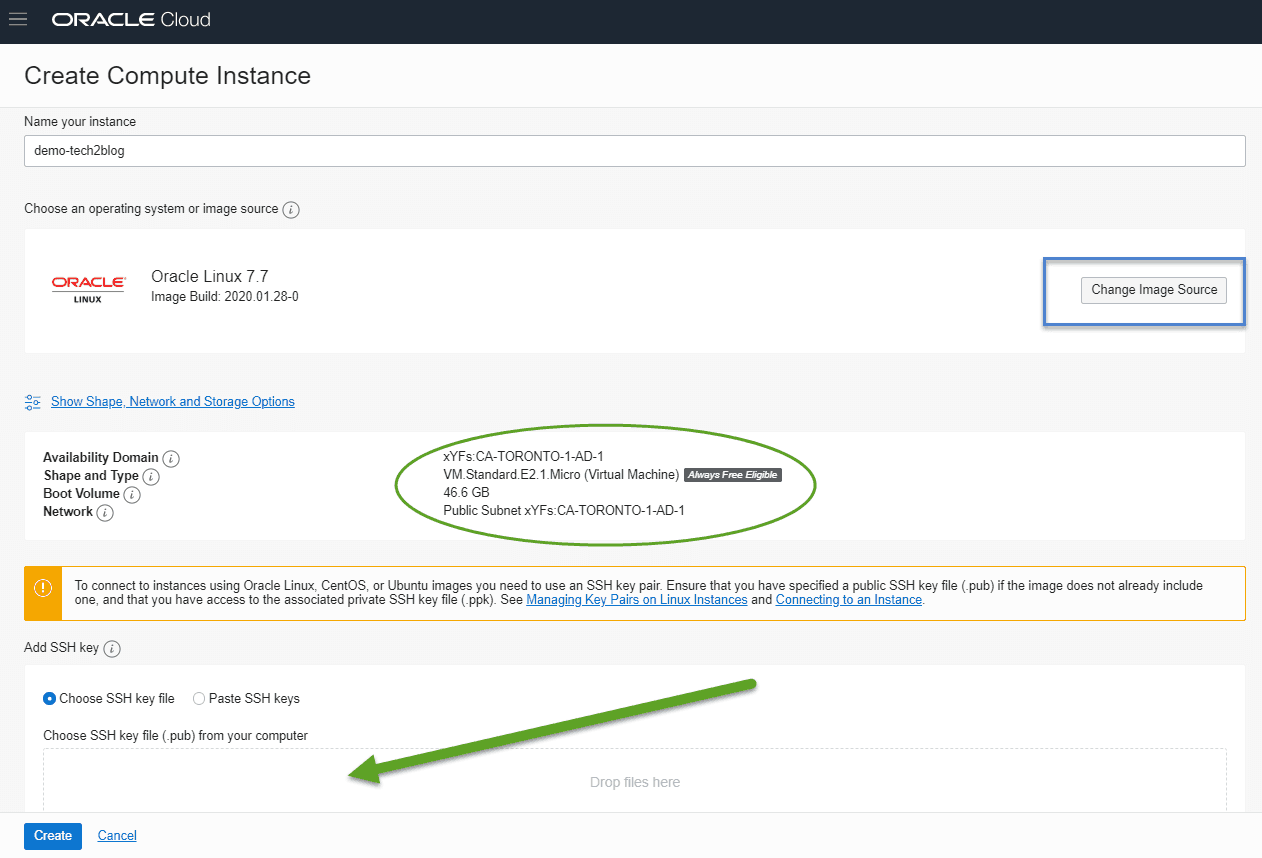
After logging, you will see a dashboard with different options, there you have to select “Create a VM Instance” and you will be presented with different options like the name of the VM, image to choose from (default is Oracle), etc.

Fill, all the details as per your requirement. Also, make sure to check the “Hide Shape, Network, Storage Options” for public IP or you can also uncheck if you don’t want one. But, you require public IP to SSH into the cloud server along with SSH key.

Now to access the free Linux cloud server, you just need to SSH using your private ssh key. Once you have logged in, you can play with your cloud server and keep it running forever.
ssh -i <path_to_key> opc@Public-IP
If you want others to access your website through IP, you will have to configure your webserver first, which can be done by installing Nginx or Apache. You can use any one of the below commands (don’t use both the commands).
$ sudo yum install httpd -y
$ sudo yum install nginx -y
Below is an example of installing Nginx server.
[opc@ora-free ~]$ sudo yum install nginx -y

=====================================================================================================================================================================
 Package                                              Arch                            Version                                    Repository                     Size
=====================================================================================================================================================================
Installing:
 nginx                                                x86_64                          1:1.16.1-1.el7                             epel                          562 k
Installing for dependencies:
 dejavu-fonts-common                                  noarch                          2.33-6.el7                                 base                           64 k
 dejavu-sans-fonts                                    noarch                          2.33-6.el7                                 base                          1.4 M
 fontconfig                                           x86_64                          2.13.0-4.3.el7                             base                          254 k
 fontpackages-filesystem                              noarch                          1.44-8.el7                                 base                          9.9 k
 gd                                                   x86_64                          2.0.35-26.el7                              base                          146 k
 gperftools-libs                                      x86_64                          2.6.1-1.el7                                base                          272 k
 libX11                                               x86_64                          1.6.7-2.el7                                base                          607 k
 libX11-common                                        noarch                          1.6.7-2.el7                                base                          164 k
 libXau                                               x86_64                          1.0.8-2.1.el7                              base                           29 k
 libXpm                                               x86_64                          3.5.12-1.el7                               base                           55 k
 libjpeg-turbo                                        x86_64                          1.2.90-8.el7                               base                          135 k
 libxcb                                               x86_64                          1.13-1.el7                                 base                          214 k
 libxslt                                              x86_64                          1.1.28-5.el7                               base                          242 k
 nginx-all-modules                                    noarch                          1:1.16.1-1.el7                             epel                           19 k
 nginx-filesystem                                     noarch                          1:1.16.1-1.el7                             epel                           21 k
 nginx-mod-http-image-filter                          x86_64                          1:1.16.1-1.el7                             epel                           30 k
 nginx-mod-http-perl                                  x86_64                          1:1.16.1-1.el7                             epel                           39 k
 nginx-mod-http-xslt-filter                           x86_64                          1:1.16.1-1.el7                             epel                           29 k
 nginx-mod-mail                                       x86_64                          1:1.16.1-1.el7                             epel                           57 k
 nginx-mod-stream                                     x86_64                          1:1.16.1-1.el7                             epel                           84 k

Transaction Summary
=====================================================================================================================================================================
Install  1 Package (+20 Dependent packages)

Total download size: 4.4 M
Installed size: 14 M

Installed:
  nginx.x86_64 1:1.16.1-1.el7

Dependency Installed:
  dejavu-fonts-common.noarch 0:2.33-6.el7                  dejavu-sans-fonts.noarch 0:2.33-6.el7            fontconfig.x86_64 0:2.13.0-4.3.el7
  fontpackages-filesystem.noarch 0:1.44-8.el7              gd.x86_64 0:2.0.35-26.el7                        gperftools-libs.x86_64 0:2.6.1-1.el7
  libX11.x86_64 0:1.6.7-2.el7                              libX11-common.noarch 0:1.6.7-2.el7               libXau.x86_64 0:1.0.8-2.1.el7
  libXpm.x86_64 0:3.5.12-1.el7                             libjpeg-turbo.x86_64 0:1.2.90-8.el7              libxcb.x86_64 0:1.13-1.el7
  libxslt.x86_64 0:1.1.28-5.el7                            nginx-all-modules.noarch 1:1.16.1-1.el7          nginx-filesystem.noarch 1:1.16.1-1.el7
  nginx-mod-http-image-filter.x86_64 1:1.16.1-1.el7        nginx-mod-http-perl.x86_64 1:1.16.1-1.el7        nginx-mod-http-xslt-filter.x86_64 1:1.16.1-1.el7
  nginx-mod-mail.x86_64 1:1.16.1-1.el7                     nginx-mod-stream.x86_64 1:1.16.1-1.el7

Complete!
Now, enable and start the “nginx & httpd” service.
$ sudo systemctl enable httpd.service
$ sudo systemctl start httpd.service
$ sudo systemctl status httpd.service

$ sudo systemctl enable nginx
$ sudo systemctl start nginx
$ sudo systemctl status nginx
You can verify if the server is running or not by using “curl” command or by directly visiting the IP (this won’t work until you have allowed access to port 80 from the “Security List”.
$ curl localhost
I hope you must have liked the article, if you are having any issue, please let me know through your comments and if you like the post and want to help this blog, please consider buying coffee for me. You can also support by sharing this article and or by liking Tech2Blog.com on Facebook.


